

When working with Arduino, ESP8266 or ESP32, you quickly hit a simple limit: not enough GPIO pins.
Instead of stacking boards or using complex expanders, there is a very clean and proven solution: shift registers.
The two main types are:
- SIPO – Serial In, Parallel Out
- PISO – Parallel In, Serial Out
Why use shift registers?
- Save GPIO pins
- Clean wiring
- Easy to scale
- Very cheap
- Used everywhere in real hardware (industry, vending, panels)
With only 3 pins, you can manage 8, 16, 32+ inputs or outputs.
SIPO – Serial In, Parallel Out
What it does
You send data bit by bit (serial), and the chip exposes them all at once on parallel outputs.
Common chip
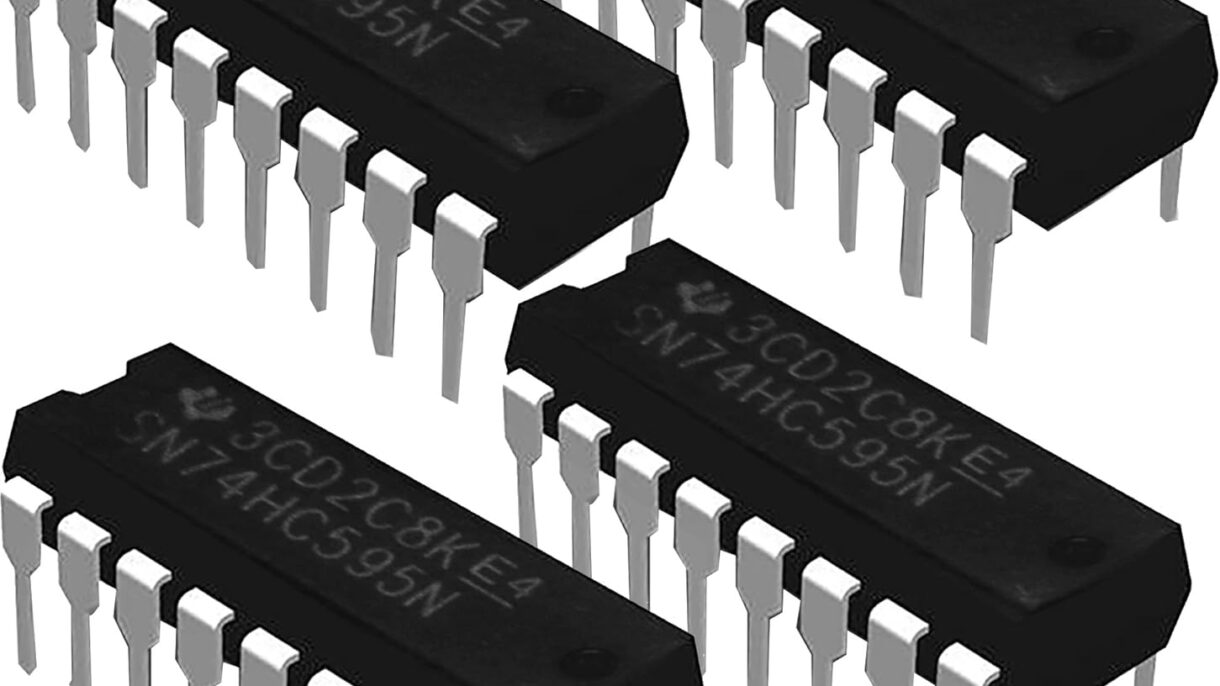
74HC595
- 8 digital outputs
- Can be daisy-chained
- Very reliable
- Fast enough for almost any project
Important pins
| Pin | Role |
|---|---|
| DS | Serial data |
| SH_CP | Clock |
| ST_CP | Latch |
| Q0–Q7 | Outputs |
| OE | Output enable (optional) |
| MR | Reset (optional) |
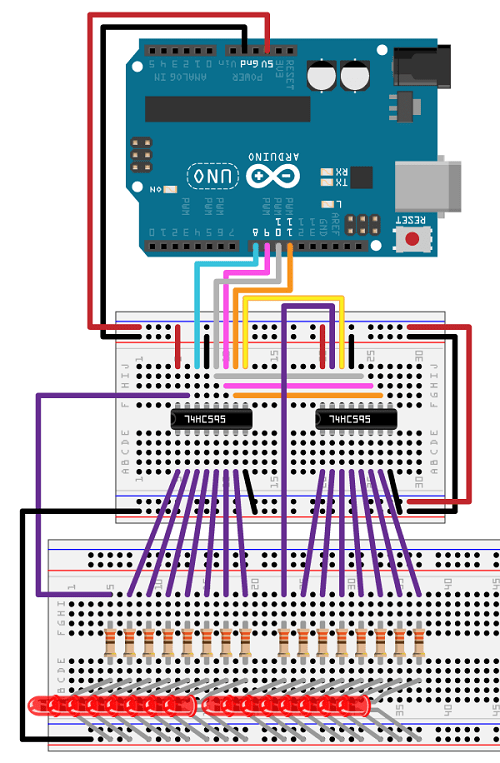
Arduino example – driving 8 LEDs
int dataPin = 11;
int clockPin = 13;
int latchPin = 10;

void setup() {
  pinMode(dataPin, OUTPUT);
  pinMode(clockPin, OUTPUT);
  pinMode(latchPin, OUTPUT);
}

void loop() {
  digitalWrite(latchPin, LOW);
  shiftOut(dataPin, clockPin, MSBFIRST, B10101010);
  digitalWrite(latchPin, HIGH);
  delay(500);
}
Typical SIPO use cases
- LEDs
- Relays
- MOSFET boards
- 7-segment displays
- Control panels
- Power boards
PISO – Parallel In, Serial Out
What it does
Reads many inputs at once, then sends their state serially to the microcontroller.
Common chip
74HC165
- 8 digital inputs
- Can be chained
- Very simple timing
Important pins
| Pin | Role |
|---|---|
| PL | Parallel load |
| CP | Clock |
| Q7 | Serial output |
| D0–D7 | Inputs |
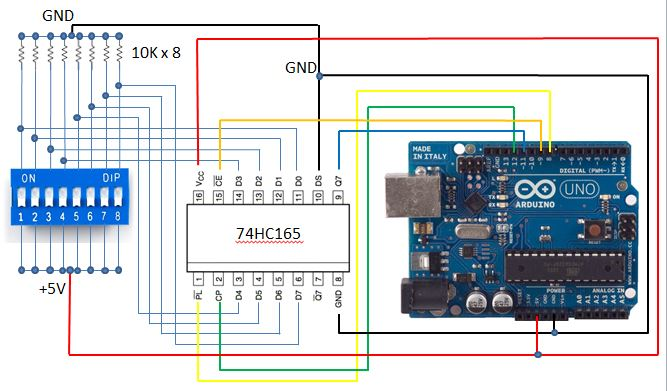
Arduino example – reading 8 buttons
int loadPin = 8;
int clockPin = 12;
int dataPin = 11;

void setup() {
  pinMode(loadPin, OUTPUT);
  pinMode(clockPin, OUTPUT);
  pinMode(dataPin, INPUT);
}

byte readInputs() {
  digitalWrite(loadPin, LOW);
  delayMicroseconds(5);
  digitalWrite(loadPin, HIGH);
  return shiftIn(dataPin, clockPin, MSBFIRST);
}

void loop() {
  byte buttons = readInputs();
}
SIPO vs PISO
| Feature | SIPO (74HC595) | PISO (74HC165) |
|---|---|---|
| Direction | Output | Input |
| GPIO needed | 3 | 3 |
| Chainable | Yes | Yes |
| Speed | High | High |
| Typical use | LEDs, relays | Buttons, switches |
Arduino vs ESP considerations
Arduino (5V)
- Works perfectly with HC / HCT chips
- Very forgiving
ESP8266 / ESP32 (3.3V)
- Prefer 74HCT or power the chip at 3.3V
- Avoid floating OE / MR pins
- Logic levels matter more
In practice, 74HC often works, but it’s not guaranteed in all cases.
Daisy-chaining
You can chain registers easily:
- Q7’ → DS for SIPO
- Q7 → DS for PISO
- Same clock and latch
Examples:
- 4 × 74HC595 → 32 outputs
- 2 × 74HC165 → 16 inputs
Alternatives
| Chip | Type | Why use it |
|---|---|---|
| MCP23017 | I²C GPIO | Interrupts |
| PCF8574 | I²C GPIO | Very simple |
| TLC5940 | PWM LED | Brightness control |
| ULN2003 | Driver | Current handling |
Still, SIPO / PISO are hard to beat for simplicity and reliability.
When SIPO / PISO are the right choice
Good choice if you want:
- Simple hardware
- Deterministic timing
- No complex bus
- Easy scaling
Not ideal if you need:
- Analog inputs
- Per-pin interrupts
- Complex feedback
Conclusion
SIPO and PISO shift registers are basic but extremely powerful tools.
They are cheap, fast, reliable, and perfectly suited for Arduino and ESP projects.
If you are building:
- a custom board
- a control panel
- a vending machine
- home automation hardware
This should be one of your first tools.